
Chip Protect Project
Task
Use the Science and Engineering Practices, combined with the Engineering Cycle to design and test a container to prevent chips from breaking, when thrown or dropped over twenty feet.
Introduction
During the process of building you always need to solve a lot of different problems. You have to think about how to use the resources you have most effectively to achieve the best result with the limitations you have.
In previous projects I learned, that there are two important parts of creating something. The design and the actual building part. These two parts are both very important, because you can not build without a design and you can not test your design, without building it.
Lacrosse Ball?
Project limitations
Before building the project I had to consider a few limitations:
- Container may be no larger than 8” x 8” x 8”.
- Container must be of unique design, using no premadecontainers. T
- his means, no premadeboxes, cartons or containers produced by someone else.
- Chips must be easily removed from the container withoutdamage or residue.
- Container should be easy to load and unload.
- Overall project should be less that $5, preferably made from recycled materials found at home.
Personal limitations
My personal limitations for the project were:
- use a few resources as you can
- build the lightest structure possible
Designing
The designing process is the first step in an engineering project. For the designing it is essential to think about different concepts and discussing their advantage and disadvantages.
Concepts
There are a lot of different possibilities of protecting the chips from breaking, but when I thought about it I had 3 different concepts in mind.
1. Concept: Box-Protection
My idea about a box protection was to build a box, which is filled with a soft substance like (foam or Popcorn). The idea was to fix the ball on the ground, fill the box with foam and put the chips in the middle. The box would be made out of cardboard, because it is more flexible and don't break like a static box out of wood or thick plastic. Furthermore cardboard is very cheap and it is easy to build a box out of it.
2. Concept: Fluid-Protection
My second idea is a fluid-protection. That means the chips are in a bag, which is in a fluid, that "absorbs" the impact of the fall and protects the chips from breaking. A possible fluid for this would be a Non-Newtonian fluid like Oobleck, which can be created very easy out of water and cornstarch.
The disadvantage of fluids like Oobleck is, that they don't work for a long time and there is the possibility of creating a mess.
3. Concept: Structure-Protection
My last idea is the protection with a structure out of straws. The straws form a structure, that protects the chips in the middle from breaking. This is much more challenging, because you need a shape, that has the stability to protect the chips from the impact of the fall, but it uses less resources and is much lighter than the other two concepts.
Concept Comparison
| Concept | Advantage | Disadvantage | Costs | Difficulty |
|---|---|---|---|---|
| Box-Protection | - easy to build - no complex design | - very big - inefficient - need many resources | medium | easy |
| Fluid-Protection | - easy to build - no complex design | - heavy - a lot of testing with fluids | heigh | medium |
| Structure-Protection | - light - need less resources | - difficult build - complex design | low | hard |
Concept Conclusion
Every concepts has its advantages and disadvantages, but I chose the Structure-Protection, because it is the best way to improve my engineering skills in designing and building. Furthermore it is the only one that fits my limitations of a light structure, that need the smallest amount of resources possible. Moreover it is less try and error and more testing different resources, before building different modules and then putting these modules together to a structure, that has a high chance to work the way it should.
Designing a Structure-Protection
There are a lot of different possibilities of choosing the shape of the structure, the materials and the size. My goal was to build a very light structure, that uses a small amount of resources and that can be used over and over again without really damaging the structure, so the materials have to be cheap and light, but also stable to protect the chips.
Modules
To have a better overview about the different parts of the project I split the different parts into three modules.
- The outer-structure
- The inner-structure
- The ball
Each of these modules need different properties and resources and has to be tested in different ways, so it is much easier to test each module on their own, before testing the whole structure together.
Module 1 - The outer structure
1. Module - The shape
Which shape is the best for the outside to protect the chips from breaking and considers my and the projects limitations?
For the shape of the structure I looked at different ideas of shapes that are very stable.
There are a lot of different two-dimensional structures. In the nature the hexagon is widely used for example in honeycombs, but this is not the most stable two dimensional structure.
The triangle is the most stable two-dimensional structure that is simple to build. This is because the force is distributed all over the structures sides and joints, so each joint experience some force, but not all of it.

As a three-dimensional structure a tetrahedron out of 3 triangles is very stable, because it has the same properties as the triangle. The only different is that 3 sides are attached to one joint and not two, which means that that on both structures every joint is attached to the other joints and the force can be distributed very easily.
When comparing this to any other shape non of these have the same properties, which is the reason, why they are more flexible and not as strong as the triangle/tetrahedron.
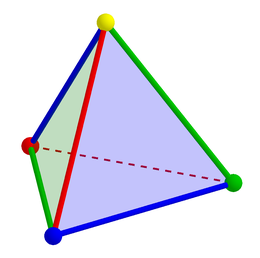
After considering all these properties I chose the tetrahedron, because I think it is the best structure for my purpose and easy to build.
1. Module - Materials
For the outside I need two different materials one, that is very strong and light for the sides and something to keep the sides in the right position.
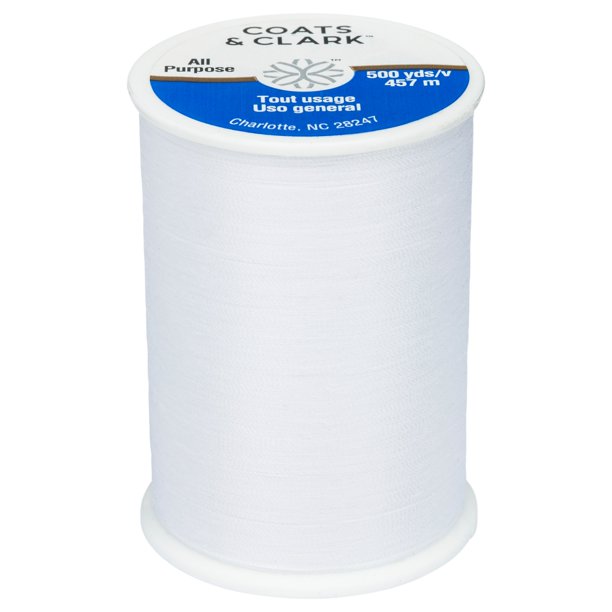
For the sides the material has to be strong, but it shouldn't be too stiff so it don't break that easy and can absorb the impact better. That's why I chose thin straws which are very light and cheap. To fix the straws in the right position I want to use a rubber band/thread that is connected on the joints.
Originally I wanted to use rubber band, but it is very difficult to pull the band through the straw and tie it in a knot at the joints. In addition, the pull on the sides is too strong to hold the straws in the right shape and the straws are subjected to permanent pressure. That's why I switched to a small and much lighter thread, which can not hold a lot of pressure.
1. Module - Final design
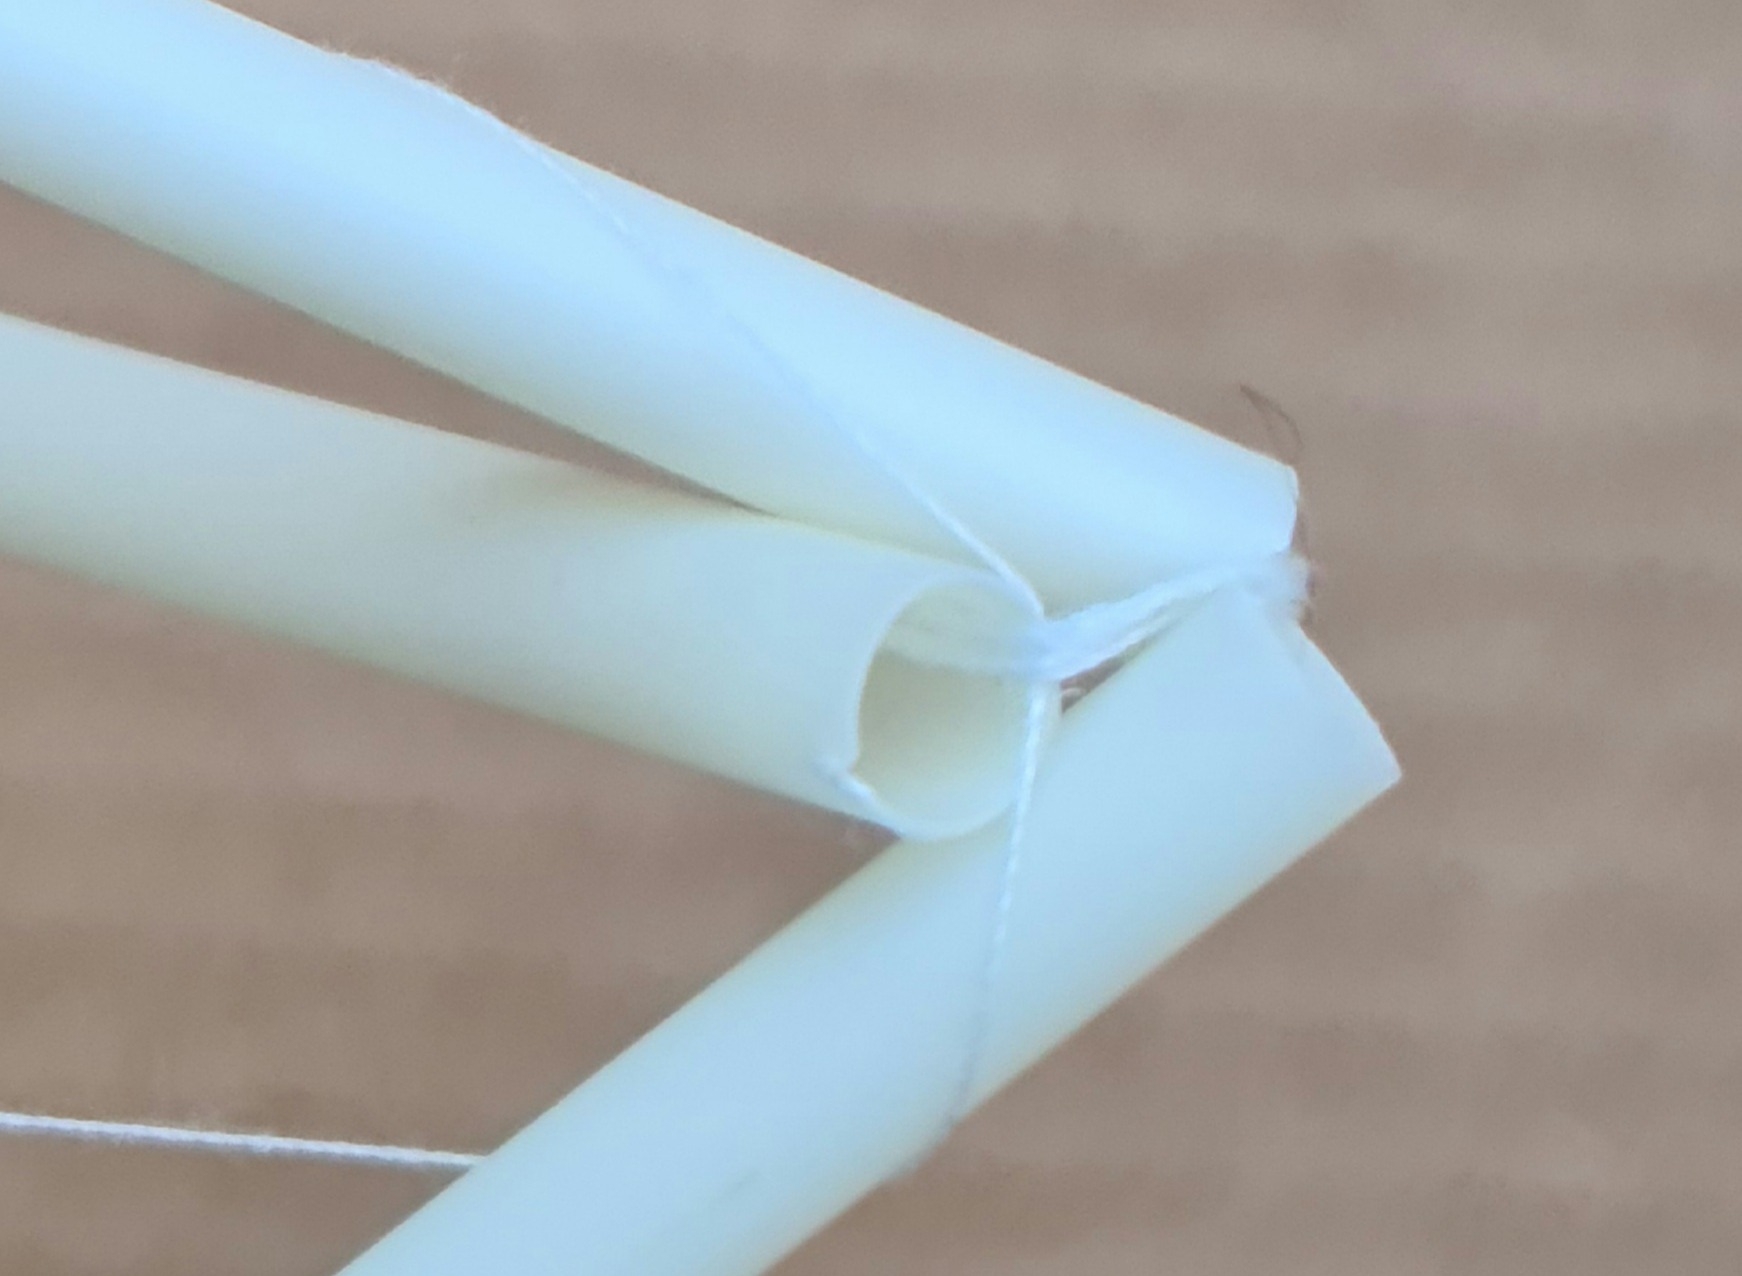
The final design of the 1. Module is a triangle out of straws. Each straw has a length of 15cm and they are connected by one thread. Too improved to durability of the thread, 3 thread are weaved together and form "one" new thread.
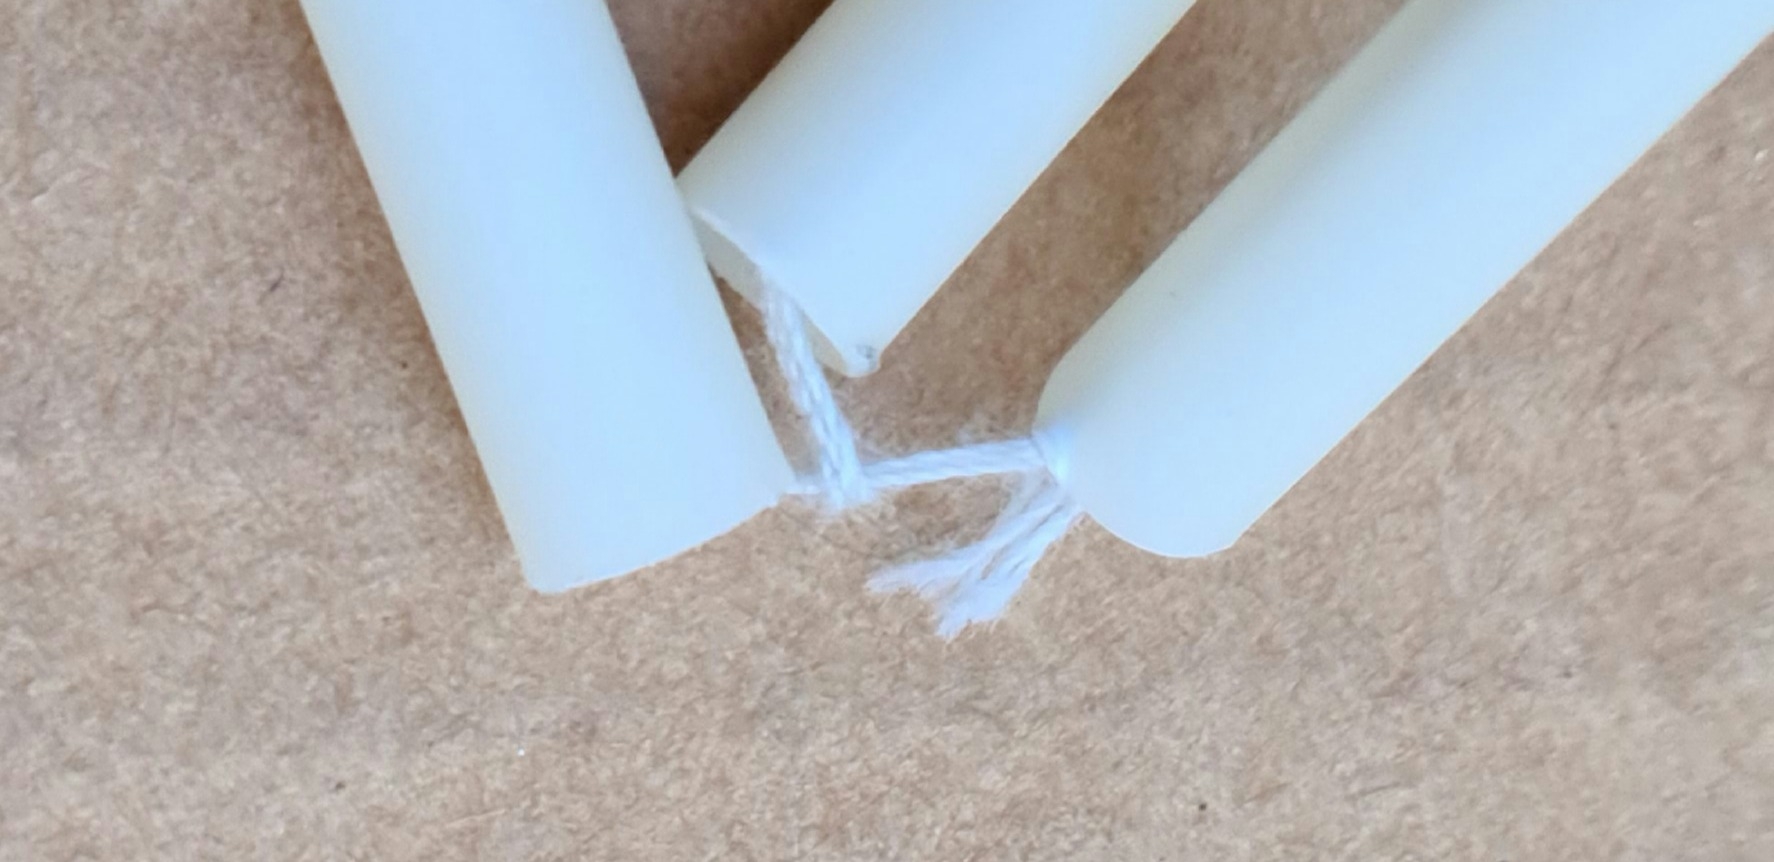
Each one of the 3 other straws to build the tetrahedron is attached to on of the joints of the triangle by one thread. Every thread forms a loop around the knot and alle the end are connected on top of the tetrahedron with a small amount of glue. This loop connection is very important for the shape of the tetrahedron, because leads to each thread has the same length. When every thread has the same length the top of the tetrahedron always stays in the middle and is more stable. The glue on the top of the tetrahedron leads to a better stability. While the top is more stable, the thread connection at the bottom is a lot more flexible.
To improve the stability on the fall and to secure the inner module better, the tetrahedron is turned around.

Module 2 - The inner-structure
2. Module - The shape
Which shape is the best for the inner-structure to maintain stability during the fall and the impact and prevent the chips from breaking?
How to connect the inner structure with the outer structure in such a way that the impact is cushioned by the outside and the impact on the chips is as low as possible?
The inner structure of my project contains the chips so it should be connected with the outer structure in such a way that the inside is protected in the best way possible. To maintain that, the inner structure have to float in the outer structure and the connection should be as flexible as possible to absorb the shock.
A very easy way to connect both structures is to build an inner structure with a similar or nearly similar shape than the outer structure. Thats why I chose a second smaller triangle out of a straw and thread. The straw is cut into three pieces which are the sides of the straw and they are hold together by one thread.
2. Module - Materials
The material of the inner module have to be very light and the triangle has to be very strong. That's why I chose the same materials for the inner structure than for the outer structure except for one pice of paper which is another padding that contains the chips.
Module 3 - The ball
To make the Chips-Protect Project harder we have to use a lacrosse ball which has an additional weight of 152g. This lacrosse ball has to be attached to the Chips Protection Structure.
The lacrosse ball don't need a special protection so you don't need a complex structure around it. The only thing you need to with the lacrosse ball is to surround it with normal rubber band so you can attach it to the tetrahedron.
Building and testing
After designing the different module the next step is to build and text the module on their own before putting them together and test the properties of the full design.
Module 1
The first module is easy to build, because of its less resources.
In total I used 6 straws and 3x 50cm and 9x 30cm of thread.
Testing
The testing of the first module worked perfect. Because the materials are so light, strong and flexible at the same time, the tetrahedron bounces when throwing out of a window and doesn't get a single scratch. Even after more than 10 throws the window the structure is still working really good and none of the straws or the threads has a serious damage.
Module 2
The second module uses with a total of 1 straw, 30cm of thread and a piece of paper even less resources than the first module.
First I build the triangle for the bottom and the i surrounded the triangle with paper. To hold the triangle in the right position inside the tetrahedron the edged of the triangle has to go through the piece of paper.
Before I can test if the chips inside the module break, I have to connect the module 1 outside structure with the module 2 inside structure. To connect them I uses 3 threads that loop around the joint of the inner structure and the outer structure. To maintain a flexibility in the inside the threads are connected in a special way on the outside structure.
The threads are attached to the straws. When the structure hit the ground the the thread is stretched. After that the force of the impact is getting reduced, because the thread on the edge tights and because the straw is flexible the thread slows down more slowly.
In total I used 1 straw and 4x 30cm of thread.

Testing
After attaching module 1 and 2 I put chips in the piece of paper and dropped the structure from my window on the floor. The structure bounces on the floor several times and remains on the floor. After the drop I checked the chips non of them is broken.
Module 3
The 3 module is about the ball and is connected with a lot of testing. During the designing process I wrote that the best way for me to attach the ball to my protection structure is to surround it with rubber band.
In total I used 1 straw and 4 rubber band of thread
Testing
While testing how high the ball jumps I had the idea to use the rubber bands to attach 4 pieces of a straw to it to reduce the height of the ball to jump. This reduce the height by more than the half, but a disadvantage after every drop the straws has to be realigned again.
Final Testing
After putting all modules together I startet testing the weaknesses of my project.
- The first thing I did was testing how strong the connection between the ball and the real protection structure is. When the ball touches the ground it jumps back into the air so it is important that the connection holds the entire time. To simulate the impact I grabbed the tetrahedron on the upper end and shook it around to test if the ball falls off.
- After about 30 seconds the ball fell out of the rubber band connection. The reason for this was, that the ball has 4 rubber bands, but the connection only uses 2 of them and the other are for the straws. to fix this problem I connected all of the bands with the thread and after that the ball never fall of again.
- My second test was how much time I need to put the chips in the paper and close it with a small piece of rubber band. In total I needed 7 seconds for this progress.
- Last but not least I tried if the chips break if I drop my project out of the window.
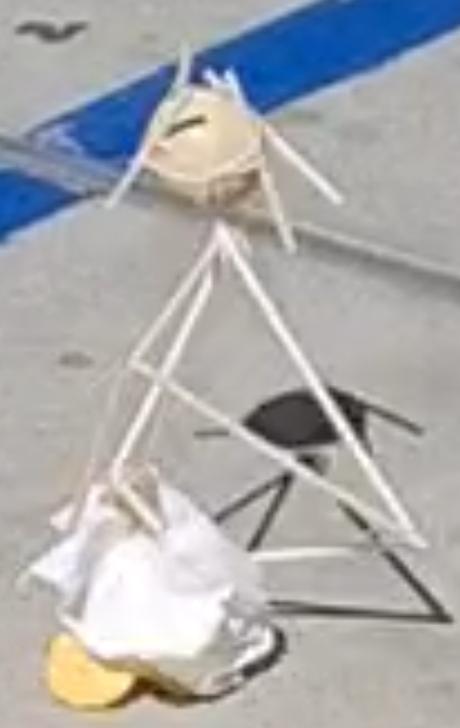
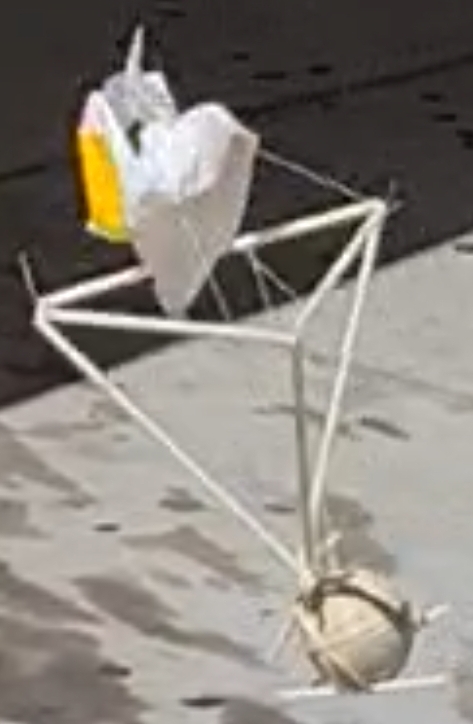
- The results of the final drop were really positive. Even if I throw it, the structure will align perfectly so the ball is always at the bottom ant the reversed tetrahedron on top. On impact the straws helped to reduce the height of the rebounds. When the ball hit the ground the straws also provide that the jump is irregular and not straight. Because of that the tetrahedron moves to the side and one of the upper edges touches the ground and bounces with the ball back in the air. This repeats several times until they stop moving. While the ball is comparatively heavy, the tetrahedron is very light and the force of impact is therefore very low. Furthermore the inner module with the chips stays in the middle during the entire fall and even there is a bit of movement the impact is spread over a longer period of time. All this leads to the fact that the chips do not break. The test was successful.
Objective Test
During the objective test everything worked perfect at first. It took me about 8 seconds to put the chips in the bag and to tape the paper shut. The only problem was, that I forgot my tape at home and I had to rely on the tape in school. But the tape didn't stick well on the paper and and had come loose during the drop.
In general the drop worked really good and everything worked how it should, but dring the first impact the tape came loose and after one more jump the first chip came out of the paper. All chips survived and the fall, but one single chip went out.
Improvements
In hindsight, I have seen that there are some things I can improve next time:
- The inner module: The inner module of the tetrahedron isn't perfect and was the only big problem in the entire project. Because I was afraid that the chips will break in a tetrahedron that is upside down I only build a triangle. This triangle was a lot harder to fix in the middle of the tetrahedron, because it has only 3 edged that has to be attached to the 4 edges in the tetrahedron.
- The tape: Tape is not sticking well on paper (especially paper towels) and it wasn't a good idea to leave my tape at home.
- The building: The building of the project wasn't very hard, but I still managed to "mess it up". The threads that hold the inner structure were too long and the knots weren't at the right spot. I definitely have to improve this next time.
Cost Analysis
Material Cost
| Name | cost |
|---|---|
| 8 Straws | $0.24 |
| 5m thread | $0.04 |
| 4 rubber bands | $0.04 |
| small amount of glue | $0.10 |
The total material cost is about $0.42.